Search Results
149 results found with an empty search
- My Favorite Gluten Free Pastas (and Exactly How I Use Them)
If you’ve been gluten free for any amount of time, you know the struggle of finding good pasta. Not just pasta that’s acceptable, but pasta that actually holds up, has the right texture, and works for specific dishes. Over the years of recipe testing for Leah x Gluten Free, I’ve narrowed down a short list of gluten-free pastas that I truly love (and that my gluten eating family will happily consume) —and most importantly, that I trust for my recipes. Not all gluten-free pasta is created equal. Some shapes work better for baked dishes, others shine in creamy sauces, and some are best kept simple. Below are my favorite gluten-free pasta brands and shapes, plus exactly how I like to use each one. How did these pastas pass my test? Consistent cooking results Minimal breakage when mixing & stirring No gritty, cardboard like taste Reheats well for leftovers Shop my gluten free pasta favorites here ! Banza Brown Rice Elbows – Homemade Macaroni & Cheese This brown rice pasta is newer on the market and already becoming a gluten free community favorite! They even collaborated with the iconic Modern Bread & Bagel to make fried mac & cheese bites, so I knew it had to be good! When it comes to homemade mac and cheese, texture is everything. I want noodles that are sturdy enough to hold up to a thick cheese sauce without turning mushy, and Banza Brown Rice Elbows consistently deliver. These elbows cook evenly and maintain their shape, which is key for creamy, stovetop mac and cheese or even a baked version. They still taste great the next day, making them a great option for leftovers too. If you’re making a classic gluten-free mac and cheese for family dinner or a holiday side dish, this is the pasta I reach for every time. Best for: Stovetop mac and cheese Baked mac and cheese Creamy, cheesy sauces Jovial Spaghetti – Spaghetti & Meatballs Jovial spaghetti is a staple in my pantry. It has a great bite and a neutral flavor that works beautifully with simple red sauces. This is my go-to for classic spaghetti and meatballs because it cooks up al dente and doesn’t clump or break easily -- it really is so easy to get a perfect cook every time. Whether you’re using homemade meatballs or store-bought, this pasta holds up well under sauce and reheats better than most gluten-free spaghetti options. Best for: Spaghetti and meatballs Marinara-based dishes Simple olive oil or garlic sauces Rummo Rigatoni – Baked Ziti If you’re making a baked pasta dish, you need something sturdy—and Rummo rigatoni absolutely shines here. The ridges help grab sauce, and the pasta holds its shape even after baking. I love using this for baked ziti or any casserole-style pasta dish because it doesn’t turn soft or grainy in the oven. I'll also use it in my Lasagna Soup if I can't find gluten free lasagna noodles. Overall, Rummo has become a favorite for many pasta dishes, especially since it seems to be the most affordable gluten free pasta in grocery stores near me. Best for: Baked ziti Pasta bakes Hearty meat or vegetable sauces Jovial Farfalle – Pasta Salad For pasta salad, shape and texture matter more than you might think. Jovial farfalle (bowties) are perfect because they hold dressing well and stay firm even after chilling -- I swear these noodles do not break! This is my favorite gluten-free pasta for summer pasta salads (you'll see them featured in my protein pasta salads -- Caesar & Chipotle ), with lots of mix-ins like veggies, herbs, cheese, or protein. It doesn’t absorb too much dressing or become soggy in the fridge, which is a huge win for make-ahead meals. Best for: Pasta salad Cold pasta dishes Picnic and potluck recipes Bionaturae Penne – Penne alla Vodka When I want a creamy, restaurant-style pasta dish, I reach for Bionaturae penne. This pasta has a smooth texture that pairs perfectly with rich sauces. It’s my top choice for penne alla vodka because it holds sauce beautifully without overpowering the dish. The penne stays tender but not mushy, which is crucial for cream-based sauces. Best for: Penne alla vodka Creamy tomato sauces Dairy-based pasta dishes Goodles – Favorite Boxed Mac & Cheese Sometimes you just want something quick, nostalgic, and easy—and Goodles is hands down my favorite boxed gluten-free mac and cheese. It ’s creamy, comforting, and actually tastes like classic boxed mac and cheese. Cue the nostalgia! Perfect for busy weeknights, quick lunches, or when you’re craving comfort food without the extra effort. Best for: Quick meals Comfort food cravings Easy gluten-free dinners DeLallo Gluten-Free Orzo – Soups, Salads & Sides Gluten-free orzo can be hard to find, but DeLallo’s version is a pantry must-have. I love using this orzo in soups, cold salads , and simple side dishes. It cooks quickly and works well in lighter recipes where you want something delicate but satisfying. Best for: Soups Orzo salads Simple side dishes Final Thoughts Finding the right gluten-free pasta often comes down to using the right shape for the right recipe . These are the brands and styles I consistently rely on in my own kitchen—and the ones I use when developing recipes for Leah x Gluten Free. If you’re new to gluten-free cooking or just looking to upgrade your pasta game, starting with these trusted options will make a huge difference in both flavor and texture. Shop my gluten free pasta favorites here ! Affiliate Disclaimer: Some of the links above are affiliate links. That means if you click through and make a purchase, I may earn a small commission at no extra cost to you . Your support helps me keep this blog going and bring you more recipes and tips — thank you!
- Easy Gluten Free Loaded Chicken Salad
My loaded gluten free chicken salad is simple, comforting, and packed with texture — the kind of recipe you’ll make once and keep coming back to. It’s made with tender shredded chicken, crisp apple, crunchy celery, red onion, and walnuts. It’s familiar, flavorful, and perfect for easy lunches, light dinners, or meal prep without feeling boring or repetitive. Chicken salad is one of those recipes that doesn’t need much to be great, but the right mix-ins make all the difference. The apple adds a subtle sweetness, the celery keeps things crisp, the red onion adds bite, and the walnuts bring just enough crunch to make it feel “loaded.” The dressing is classic — mayo and Dijon mustard — seasoned simply with salt and pepper so all the textures and flavors shine. This recipe is naturally gluten free and easy to customize depending on what you have on hand. It’s also a great way to use up leftover chicken, whether that’s a roasted chicken breast, meal-prepped chicken, or even rotisserie chicken. Prep Time: 10 minutes Cook Time: 15 minutes Serves: 2 Ingredients: 1 Chicken Breast, cooked and shredded 1 cup of Chicken Broth ½ an Apple, chopped ¼ cup of Red Onion, diced 1 Celery Stalk, diced ¼ cup Walnuts, chopped 1/2 cup Mayonnaise or Greek Yogurt 1 Tbsp. Dijon mustard Salt and Pepper to taste Instructions: Start with a fully cooked chicken breast. If it’s freshly cooked, let it cool slightly, then shred it using two forks or your hands. Shredded chicken gives this salad the best texture and helps it soak up flavor. Place the shredded chicken in a bowl and pour the chicken broth over it. Toss gently to coat. This step keeps the chicken moist and flavorful and prevents the salad from feeling dry, especially after chilling. Chop the apple into small bite-sized pieces. Dice the red onion and celery evenly so they distribute well throughout the salad. Roughly chop the walnuts for a little crunch in every bite. Add the apple, red onion, celery, and walnuts to the bowl with the chicken. Toss gently to combine. Add mayonnaise — start with a few spoonfuls and add more as needed — along with the Dijon mustard. Season with salt and pepper. Stir until everything is coated and creamy, adjusting mayo and seasoning to taste. Refrigerate the chicken salad for at least 15–20 minutes before serving. This helps the flavors meld and gives the salad the best texture. Tips for the Best Loaded Chicken Salad Don’t skip the broth: Tossing the chicken with broth makes a big difference in moisture and flavor. Dice small: Smaller pieces mean more balanced bites and better texture throughout. Use a crisp apple: Honeycrisp or Fuji work well and won’t get mushy. Toast the walnuts: Toasting them for a few minutes in a dry skillet adds extra depth and crunch. Go easy on the mayo at first: You can always add more, but it’s easier to build than fix an overdressed salad. Serving Ideas This loaded gluten-free chicken salad is extremely versatile. Serve it: On gluten-free bread or rolls In lettuce cups for a lighter option With gluten-free crackers on a snack board Scooped over mixed greens Straight from the bowl (no judgment)
- Dairy Free Cannoli Dip
If you love the classic flavor of cannoli but are looking for a version that’s dairy-free (whether for intolerance, preference, or just curiosity), this dairy-free cannoli dip is about to be your new go-to dessert. It delivers all the creamy sweetness, vanilla-cinnamon warmth, and mix-in fun of traditional cannoli filling without any dairy — and it’s so easy to throw together that it’s a favorite for parties, game nights, snack boards, or simple weeknight dessert cravings. This dip tastes like all the best parts of a cannoli shell filling — rich, slightly tangy, and speckled with chocolate — but with coconut-based and dairy-free alternate ingredients that give you that luscious texture without dairy milk or cream cheese. Pair it with fruit, gluten-free cookies, graham crackers, or cinnamon chips for dipping and you’ve got a sweet treat that feels special but comes together in minutes. Prep Time: 10 minutes Serves: 8 Ingredients: 1 cup Kite Hill Ricotta 1 cup Kite Hill Cream Cheese 1 cup Powdered Sugar 1 tsp Vanilla Dash of Almond Extract (optional) ¾ cup Mini Chocolate Chips Strawberries, GF pizzelle, Siete Churro Strips , GF pretzels, etc. Instructions: In a medium bowl, add the dairy-free cream cheese. Use a hand mixer or a sturdy whisk to beat it until smooth and creamy with no lumps. Softened cream cheese makes this step easy. Sprinkle in the powdered sugar, vanilla extract, and cinnamon. Continue to whip until the sugar dissolves and the mixture turns velvety and light. Taste the sweetness and add a bit more powdered sugar if you prefer it sweeter. Gently fold in your dairy-free whipped topping. This gives the dip extra lightness and a smoother scoopable texture. Be gentle so you keep the airiness and don’t deflate it. Fold in the dairy-free miniature chocolate chips so they’re evenly distributed without breaking up the dip texture. If you have time, cover and refrigerate the dip for 10–15 minutes. Chilling helps the flavors come together and gives a firmer, dip-worthy texture. Transfer the dip to a pretty serving bowl and surround it with your favorite dippers — fresh fruit like strawberries or apple slices, gluten-free graham crackers, cinnamon chips, or crispy cookie dippers. This mix of textures makes it even more fun and crowd-pleasing. Pro Tips for Success Softened ingredients make it smoother Make sure the dairy-free cream cheese isn’t cold straight from the fridge so it blends seamlessly with the sugar and vanilla. Adjust sweetness to your taste If you like your dessert on the sweeter side, add another tablespoon or two of powdered sugar before folding in the whipped topping. Use quality dairy-free chips Mini chocolate chips are a delight here — go dairy-free and enjoy every chocolatey bite without the dairy. Try mix-ins A pinch of orange zest or a sprinkle of crushed pistachios gives fun flavor twists that still keep the cannoli vibe. Pair with a variety of dippers Fresh fruit adds brightness, while gluten-free graham crackers or cinnamon chips bring crunch — mix and match! Affiliate Disclaimer: Some of the links above are affiliate links. That means if you click through and make a purchase, I may earn a small commission at no extra cost to you . Your support helps me keep this blog going and bring you more recipes and tips — thank you!
- The Perfect Gluten Free Snickerdoodles
If you’ve ever struggled to find a gluten free snickerdoodle that actually tastes like the classic cookie you remember, this recipe is for you. My perfect gluten free snickerdoodles are soft, chewy, coated in cinnamon sugar, and have that signature tangy flavor that makes a snickerdoodle a snickerdoodle — not just a sugar cookie in disguise. You don’t need fancy techniques or hard-to-find ingredients, and no one will guess they’re gluten free unless you tell them. Snickerdoodles are one of those nostalgic cookies that feel right year-round but especially shine during the fall and holiday baking season. Between the warm cinnamon sugar coating and the soft, crackled tops, they’re cozy, familiar, and always a crowd-pleaser. Making them gluten free can be tricky, though — the texture matters. Too dry and crumbly? Not it. Too dense? Also not it. This recipe strikes the balance so you get cookies that bake up tender in the center with lightly crisp edges, just like the classic version. These gluten-free snickerdoodles are perfect for cookie swaps, bake sales, lunchbox treats, or a simple afternoon baking session. They hold their shape, store well, and freeze beautifully, making them a great go-to cookie recipe to keep on hand. Prep Time: 20 minutes Cook Time: 12-14 minutes Makes: 24 cookies Ingredients: 2 ¼ cups Gluten Free Flour 1 cup Almond Flour ½ cup Potato Starch 2 tsp Cream of Tartar 1 ½ tsp Baking Soda 1 tsp Salt 1 tsp Xanthan Gum 1 ½ sticks of Butter 1 ½ cups Brown Sugar 1 tbsp Vanilla 2 Eggs 3 tbsp Granulated Sugar 1 tbsp Cinnamon Instructions: Preheat your oven to 350°F and line two baking sheets with parchment paper. This helps prevent sticking and ensures even baking. In a large bowl, beat the softened butter with 1 cup of the sugar until light and fluffy. This step is key for soft, chewy cookies. Mix in the eggs one at a time, followed by the vanilla extract, scraping down the sides of the bowl as needed. In a separate bowl, whisk together the gluten-free flour, cream of tartar, baking soda, salt, and cinnamon. Gradually add the dry ingredients to the wet ingredients, mixing just until combined. The dough should be soft but scoopable. In a small bowl, mix the remaining sugar with the cinnamon. Scoop the dough into 1-inch balls, roll each ball in the cinnamon sugar mixture, and place on the prepared baking sheets, leaving space between cookies. ake for 8–10 minutes, until the edges are set and the tops are lightly cracked. The centers will look slightly underbaked — that’s what keeps them soft. Let the cookies cool on the baking sheet for a few minutes before transferring to a wire rack to cool completely. Tips for Perfect Gluten-Free Snickerdoodles Use room-temperature butter for better texture and even mixing Don’t overbake — gluten-free cookies firm up as they cool Cream of tartar matters — it gives snickerdoodles their classic tang and chewy texture Chill the dough for 20–30 minutes if it feels too soft or sticky Measure flour carefully — too much flour can make gluten-free cookies dry Affiliate Disclaimer: Some of the links above are affiliate links. That means if you click through and make a purchase, I may earn a small commission at no extra cost to you . Your support helps me keep this blog going and bring you more recipes and tips — thank you!
- Pumpkin White Bean Chili
When the weather starts to cool, my pumpkin white bean chili is one of those meals I turn to again and again. It’s warm, hearty, and packed with cozy fall flavor thanks to pumpkin puree, white beans, tender chicken, and just the right blend of spices. This chili feels familiar and comforting like classic white bean chili but with a seasonal twist that keeps it exciting all autumn long. What I love most about this recipe is how easy it is to make — and how satisfying it is on chilly nights. The pumpkin adds body and a subtle sweetness that complements the savory broth and spices, while the white beans and chicken keep it filling and meal-worthy. It’s great for weeknight dinners, game day, meal prep, or feeding a crowd. Serve it with your favorite toppings and sides for a full dinner your whole family will enjoy. Prep Time: 15 minutes Cook Time: 60+ minutes Serves: 6 Ingredients: 2 tbsp Olive Oil 1 medium yellow Onion 3 cloves of Garlic, chopped 1 lb Ground Turkey 1 ½ tbsp Coriander 1 ½ tbsp Paprika 1 tsp Cumin 1 tsp Black Pepper 1 tsp Ground Thyme 1 tsp Salt 2 16oz cans Cannellini Beans 1 16oz can Pumpkin Puree 4 cups chicken or vegetable Broth ½ cup Coconut Cream (or milk of choice) 2 cups Frozen Kale Instructions: Heat the olive oil over medium heat in a large soup pot or Dutch oven. Add the diced onion and cook until softened, about 4–5 minutes. Stir in the minced garlic and cook another minute until fragrant. Add the ground turkey or chicken to the pot, breaking it up with a wooden spoon as it cooks. Season with cumin, smoked paprika, chili powder, salt, and pepper. Cook until the meat is no longer pink. This step builds the savory flavor base for the chili. Stir in the white beans, pumpkin puree, and chicken broth. Bring the mixture to a simmer, then reduce the heat to medium-low. Let the chili cook gently for about 20–25 minutes to allow the flavors to meld together. The pumpkin gives the broth a rich texture and subtle sweetness. Once the chili is fragrant and slightly thickened, stir in the apple cider vinegar and lime juice. These acids brighten the rich flavors and balance the pumpkin’s sweetness. Give the chili a final taste and adjust seasoning as needed. Ladle the hot chili into bowls and serve with your favorite toppings like sliced avocado, chopped cilantro, tortilla strips, shredded cheese, or a dollop of Greek yogurt or sour cream. Each topping brings extra texture and flavor. Tips for the Best Pumpkin White Bean Chili Adjust the Spice Level: If you prefer a mild chili, stick with the spice amounts listed. Craving heat? Add a pinch of cayenne pepper or a diced jalapeño with the onions. Make It Heartier: Stir in cooked quinoa or brown rice just before serving for even more staying power. Better Texture: If your chili gets too thick as it sits, add a splash more broth or water. Flavor Build-Up: Sautéing the spices with the meat helps bloom their flavors for a deeper, richer chili. Meal Prep Friendly: This chili tastes even better the next day once the flavors have had time to rest — perfect for leftovers. Check out the previous installments of my Pumpkin Season Series here: Pumpkin Spice Pancakes Pumpkin Cinnamon Chip Scones Black Pepper & Goat Cheese Pumpkin Pasta Gluten & Dairy Free Pumpkin Cheesecake Pumpkin Chocolate Chip Cookies Affiliate Disclaimer: Some of the links above are affiliate links. That means if you click through and make a purchase, I may earn a small commission at no extra cost to you . Your support helps me keep this blog going and bring you more recipes and tips — thank you!
- Gluten Free Pumpkin Chocolate Chip Cookies
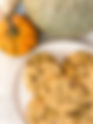
When pumpkin season hits, nothing satisfies quite like a batch of my gluten free pumpkin chocolate chip cookies fresh from the oven. These cookies are soft, slightly chewy, loaded with chocolate chips, and spiced just right for autumn. The pumpkin puree adds moisture, color, and subtle flavor without making them cakey — that’s the goal with this recipe. In fact, using just the right amount of pumpkin puree (⅓ cup) keeps the texture more like classic chocolate chip cookies instead of a dense, cake-like cookie. What I love most about these cookies is that they deliver on flavor and texture while still feeling cozy and seasonal. Whether you’re baking for a crowd at a fall get-together, packing them into lunchboxes, or just craving something sweet, these pumpkin chocolate chip cookies hit all the right spots. Prep Time: 20 minutes Cook Time: 12-14 minutes Makes: 24 cookies Ingredients: 2 cups Gluten Free Flour 1/2 cup Cornstarch ½ cup Almond Flour 1 ½ tsp Baking Soda 1 tsp Salt 3 tsp Pumpkin Pie Spice ½ cup Butter, melted 1 tbsp Vanilla 1 Egg ¾ cup Brown Sugar ¾ cup White Sugar ⅓ cup Pumpkin Puree 2 cups Chocolate Chips Instructions: Preheat your oven to 350°F and line a baking sheet with parchment paper. In a large bowl, whisk together the gluten-free flour, cornstarch, almond flour, baking soda, salt, and pumpkin pie spice until evenly combined. In a separate bowl, beat the egg, melted butter, vanilla extract, brown sugar, and white sugar until light and fluffy. Add the pumpkin puree and stir until fully incorporated. Gently add the dry ingredients to the wet ingredients, mixing until just combined. Be careful not to overmix — you want the dough soft but not tough. Fold the chocolate chips into the dough until evenly distributed. You can add a few extra on top of each cookie just before baking for a bakery look. Cover the bowl and refrigerate the dough for about 30 minutes. Chilling helps prevent the cookies from spreading too thin and helps them stay chewy. Scoop cookie dough balls (about 2 tablespoons each) onto the lined baking sheet, spacing them a couple of inches apart. Bake for 12–14 minutes or until the edges are just set and the centers look soft. Let the cookies cool on the baking sheet for 5 minutes before transferring to a wire rack to finish cooling. These cookies are irresistible warm, but they also store well. Check out the previous installments of my Pumpkin Season Series here: Pumpkin Spice Pancakes Pumpkin Cinnamon Chip Scones Black Pepper & Goat Cheese Pumpkin Pasta Gluten & Dairy Free Pumpkin Cheesecake Tips for the Best Pumpkin Chocolate Chip Cookies Measure Flour Properly: Gluten-free flour blends can vary in density. Spoon and level the flour into the measuring cup or use a kitchen scale for best results. Don’t Overmix: Mixing too much can make cookies tough. Stir until ingredients are just combined. Chill the Dough: Letting dough rest before baking yields thicker, chewier cookies. Add Extra Chips: Pressing a few extra chocolate chips into the tops of the dough balls before baking gives a more eye-catching result. Storage: Store cooled cookies in an airtight container at room temperature for several days — they stay soft and chewy. Affiliate Disclaimer: Some of the links above are affiliate links. That means if you click through and make a purchase, I may earn a small commission at no extra cost to you . Your support helps me keep this blog going and bring you more recipes and tips — thank you!
- Easy Cranberry Jalapeño Meatballs (Slow Cooker Appetizer or Dinner)
If you’re looking for a dish that’s effortless, festive, and seriously satisfying, my easy cranberry jalapeño meatballs made in the slow cooker are exactly that. They strike a delicious balance of sweet cranberry sauce and a kick of jalapeño heat, and the slow cooker does all the work while you go about your day. Whether you’re serving them as an appetizer at a holiday party or over rice for a cozy weeknight dinner, they’re always a hit. This recipe has become a favorite because it’s simple — only a handful of ingredients — and totally customizable depending on how sweet or spicy you want the sauce. I like using pre-made gluten-free meatballs to keep things easy, but you can absolutely make your own if you prefer. Serve them with toothpicks as finger food or plate them over rice with roasted vegetables for a heartier meal. Prep Time: 10 minutes Cook Time: 120 minutes Serves: 6 Ingredients: 1 pack Amylu Cranberry Jalapeno Meatballs 1 Jalapeno, diced 8 oz Cranberry Sauce 1 cup Broth 2 tbsp Cornstarch Salt and Pepper to taste Instructions: Add the thawed meatballs to the bowl of your slow cooker. Top with the diced jalapeño, cranberry sauce, and broth. Season lightly with salt and pepper. Cover and cook on high for 2–3 hours, stirring once if possible. When ready to serve, carefully remove the meatballs from the slow cooker and set aside. In a small bowl, whisk together the cornstarch with water using a 2:1 water-to-cornstarch ratio to create a slurry. Stir the slurry into the slow cooker sauce and let cook uncovered for a few minutes, stirring occasionally, until thickened. Return the meatballs to the slow cooker and toss until evenly coated in the cranberry jalapeño sauce. Serve warm with toothpicks as an appetizer or over rice with roasted vegetables for a simple, satisfying main dish. Why You’ll Love These Meatballs There’s something about the sweet tang of cranberry paired with jalapeño heat that feels festive and exciting without being overly complicated. The slow cooker keeps everything juicy and tender, and the sauce thickens into this rich, sticky glaze that clings to every little meatball. They’re perfect for parties, game days, or an easy dinner that everyone asks about. Tips for the Best Results Adjust the heat: Keep the jalapeño seeds in for more spice, or remove them if you want a milder sauce. Make it ahead: You can prepare this in the morning and keep it on warm until guests arrive. Serving variations: These meatballs aren’t just for appetizers — pair them with mashed potatoes, cauliflower rice, or basmati rice for a full meal. Thicker sauce: If you prefer an even stickier glaze, let the sauce reduce a bit longer on high after adding the cornstarch slurry. Swap broth types: Chicken broth adds savory depth — vegetable broth works too if you need a lighter flavor.
- The Fluffiest Gluten Free Pumpkin Spice Pancakes
Fall is by far my favorite time of the year. As I sit here writing this, football is on, it's raining out, I am in comfy clothes and everything just feels right. I am also such a sucker for anything pumpkin spice. I love the extra moisture that pumpkin brings to breads and pastries and Nutmeg and Clove are some of my favorite spices to bake with. I wanted to start off my Pumpkin Season Series with something simple - pancakes!! However, In the gluten free world, pancakes can be somewhat difficult. They’re either too thin or too dense. My gluten free pumpkin pancakes change the narrative – they are perfectly fluffy and moist! My keys to this are Olive Oil instead of butter or Vegetable Oil (just trust me on this one) and lots of Baking Powder! As my Nana would say, I definitely “gild the lily” when it comes to these pancakes because I do add mini chocolate chips, pecans, and cinnamon chips to the batter just to take them up a notch, but that embellishment is definitely optional! Prep Time : 10 minutes Cook Time: 15 minutes Makes: 16 pancakes Ingredients: 2 cups Gluten-Free All-Purpose Flour (I use Bob’s Red Mill ) ½ cup Pumpkin Puree 1 ½ cups Milk of choice 2 tbsp Olive Oil 1 Egg 3 tbsp Brown Sugar 2 tsp Vanilla Extract 4 tsp Baking Powder 1 tsp Baking Soda ½ tsp Salt 3 tsp Pumpkin Pie Spice Chocolate Chips, Pecan Halves, or Cinnamon Chips (optional) Instructions: In a large bowl, whisk together the gluten-free flour, baking powder, baking soda, salt, and pumpkin pie spice. This ensures the leavening and spices are evenly distributed so your pancakes rise beautifully. In another bowl, whisk together the pumpkin puree, milk, olive oil, egg, brown sugar, and vanilla extract until smooth and combined. Slowly add the dry ingredients to the wet ingredients, stirring gently until just combined. Be careful not to overmix — you want to keep the batter light for fluffy pancakes. If you want to add mini chocolate chips, cinnamon chips, or pecans, fold them in now. Let the batter rest for about 10 minutes. This gives the gluten-free flour time to hydrate and helps the pancakes get airy and soft. Warm a nonstick skillet or griddle over medium heat. Lightly grease with oil or nonstick spray. Pour about ¼ cup of batter onto the hot pan for each pancake. When bubbles form on the surface and the edges start to set (about 2-3 minutes), flip and cook the other side until golden brown. Stack the pancakes high with your favorite toppings — classic maple syrup, a pat of butter or dairy-free spread, extra cinnamon chips, or even a dollop of whipped cream make them extra special. Tips for Fluffy Pumpkin Pancakes: Don’t skip the rest time. Letting the batter sit even 10 minutes helps hydrate the gluten-free flour so the pancakes rise better and stay light. Use olive oil instead of butter. This helps keep them moist without weighing them down. Choose your mix-ins. Mini chocolate chips, cinnamon chips, or chopped pecans add texture and make breakfast feel extra fun. Use a gentle heat. Medium heat ensures the pancakes cook through without burning on the outside.
- Air Fryer Lemon Garlic Mahi Mahi
This lemon garlic mahi mahi recipe is one of my favorite quick-and-easy dinner ideas when I want something light, flavorful, and ready in about 15 minutes. Mahi mahi is a mild, flaky white fish that loves bold citrus and garlic — and the combination of fresh lemon, aromatic garlic, and simple seasonings never fails to deliver. It’s perfect for weeknights, date-night dinners, or anytime you want something wholesome without a ton of fuss. Mahi mahi cooks quickly and pairs beautifully with bright, acidic flavors that help enhance its natural sweetness. I like to serve this with fluffy rice and roasted vegetables, a simple green salad, or even cauliflower rice for a lighter meal. If you don’t have an air fryer, you can switch easily to the oven or skillet — all of which still give you tender, flaky results. Prep Time: 5 minutes Cook Time: 8-10 minutes Serves: 4 Ingredients: 4 filets of Mahi Mahi 2 Lemons 2 cloves of Garlic, crushed 1 tsp Garlic Powder 1 tsp Black Pepper ½ tsp Salt Instructions: Pat the mahi mahi fillets dry with paper towels — removing excess moisture helps the seasoning stick and promotes even cooking. In a bowl, combine the lemon juice, crushed garlic, garlic powder, salt, and black pepper. Add the mahi mahi and toss gently so each fillet is coated in the citrus and spices. Spray the bottom of the air fryer basket with cooking spray and preheat to 400°F (200°C). If you’re using an oven, preheat to 400°F and lightly oil a baking dish. In a skillet, heat a drizzle of olive oil over medium-high. Place the seasoned fillets in the air fryer basket (or in the hot skillet/oven dish), avoiding overlap. Top each fillet with a couple of lemon slices. Cook for 8–10 minutes in the air fryer, or until the fish flakes easily with a fork. If using the oven, cook for 10–12 minutes; for the skillet, cook about 4–5 minutes per side until golden and done. Remove the mahi mahi from heat and plate it with extra lemon slices. Squeeze more lemon juice over top if you like — it brightens the dish even more. Tips for Best Results: Pat the fish dry before seasoning so the lemon and garlic cling beautifully and the fillets cook evenly. Don’t overcook: Mahi mahi cooks fast — once it flakes easily with a fork, it’s done. Overcooking can make it dry. Add fresh herbs: A sprinkle of chopped parsley or basil at the end adds color and fresh flavor. Try different cooking methods: Air fryer gives great texture, but oven baking and skillet searing work beautifully too (and only take a few extra minutes).
- Gluten Free Pumpkin Cinnamon Chip Scones
One of my fondest childhood memories is going to the little “tea room” in our downtown beach town—home of the most incredible scones served warm with clotted cream and jam. It was always such a special treat when my mom brought them home, and ever since then, scones have held a permanent place in my heart. But as much as I love them, gluten-free scones are usually… disappointing. It’s taken a lot of trial and error to create a recipe that truly lives up to the nostalgia. That’s why I’m so excited to finally share these gluten-free Pumpkin Cinnamon Chip Scones—soft, tender, perfectly spiced, and everything I’ve been chasing in a cozy fall bake. They’re the ultimate afternoon treat, especially with a hot coffee or chai, and proof that gluten-free scones can be just as special as the ones I grew up loving. Prep Time: 15 minutes Cook Time: 22-25 minutes Serves: 8 scones Ingredients: 2 & ¼ cups Gluten-Free All-Purpose Flour 2 tbsp Brown Sugar 2 tsp Baking Powder 1 tsp Xanthan Gum ½ tsp Baking Soda ½ tsp Salt 1 tsp Pumpkin Pie Spice 1 tsp Cinnamon 1 stick of cold Butter (vegan butter works here too!) 1 Egg ½ cup Sour Cream (or greek yogurt or dairy free yogurt substitute) ½ cup Pumpkin puree 1 tsp Vanilla Extract ½ cup Cinnamon Chips Preheat your oven to 375F and line a pan with parchment paper. In a bowl whisk together your flour, brown sugar, baking powder, xanthan gum, baking soda, salt, and spices. Cut the butter into the flour mixture until the mixture is crumbly. You can do this using two forks. Add your cinnamon chips to the flour mixture. In a separate bowl, combine your egg, sour cream (or sour cream substitute), pumpkin puree, and vanilla. Add your wet ingredients into your dry ingredients with a wooden spoon until everything comes together. Don’t be alarmed if it is still a little crumbly. Dust your counter and the dough with some flour and lightly push the dough together, being careful to not to overwork the dough. If you spend too much time forming the dough, the butter will melt. Shape the dough into a circle about 8-9inches across & an inch thick. Cut into 8 even triangles and carefully transfer to your pan. An optional final step is to brush the scones with melted butter and sprinkle with a little bit of turbinado sugar. Bake for 20-25 minutes or until golden brown. Tips for Perfect Scones Every Time: Keep everything cold: Cold butter and quick mixing help make light, flaky scones instead of dense ones. Don’t overwork the dough: Use a light hand — overmixing can make scones tough. Add a little sparkle: A sprinkle of turbinado sugar on top before baking adds a perfect crunch and shine. Serve warm: These are best enjoyed warm with a hot drink — coffee, chai, or even a latte. Check out the first installment of my Pumpkin Season Series here: Pumpkin Spice Pancakes